I will not discuss much about this for now.
Revit how to make top level of roof extend.
To do this method you need to select the roof and edit the roof footprint.
When you select the roof face roof shape handles display.
Drag the shape handles to extend the roof.
Yes it was that easy.
In the drawing area select the roof face.
Use join unjoin roof tool.
If this option is unchecked the floor sketch will use the outer interior or exterior face.
This tool is located in the modify tab.
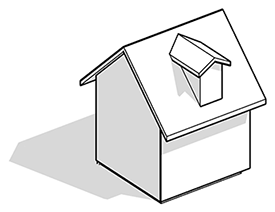
Use it to extend the dormer roof to the main roof.
In the following example the image on the left shows a roof placed on walls that have been drawn with their top constraint specified as level 2.
For example if you are in the level 2 plan view of a multi story building and you select level 4 as the top revit keeps level 4 as the top even if you add levels between level 2 and level 4.
Shape handles are not available for surfaces created by openings placed in roof faces.
Then follow these 2 steps.
The middle image shows the effect of attaching the walls to the roof.
In the view range dialog levels used to define the visible range are absolute to the current level of the view.
Watch me extend a roof over a new wing.
If you were to delete level 4 then the clip plane would revert back to the default level.
To create a dormer model required walls and additional roof.
Revit video tip of the day.
Changing slope angle and using slope arrow.
The image on the right shows how the wall profile changes accordingly when the pitch of the attached roof is changed.
Shape handles are available for all non horizontal side surfaces.
By default when you pick a compound wall with multiple layers the floor sketch will extend to the core boundary of the wall.
Revit made easier with axiom s easy to use tools.
In this video i show you how to attach the walls in revit to the roof above them.
If desired you can specify an offset using a positive or negative value.
Mass are quite easy to make but using this method might be require a lot of works.
If your design is quite simple you will not want to spend to much time on your roof.